Today, I will describe the setup of a fully usable development environment for Kodi, based on Python 2.7.15 SDK and Eclipse, in 5 steps which will take approximately 15 min.
Then, let’s start with the Python install. Please download the Python 2.7.15 on the official web site: https://www.python.org/downloads/release/python-2715/
Step #1 – Python 2.7.15 install
Kodi, in its latest official release 17, is embedding Python 2.7.15. Currently, it is not compatible with Python 3.x. It will be one of the major improvements of the next future development release 19 (not yet started). But for all developers, it is a huge challenge, because most of the thousands of Kodi mods and plugins shall be migrated to Python 3.x… it shall be done for 2020, not before.
Choose the right version for your system, in my case the 64bits version for Windows. Then, install it by executing the setup. I suggest to use a directory in the root. Such as c:\Python27 for Windows.

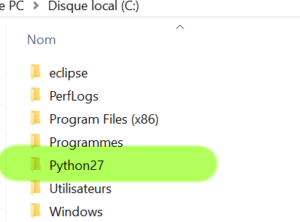
Step 2 # – Python added to the PATH environment variable
The next step is to add Python in the PATH.
On Windows 10, go to the search bar and enter “path”, then choose “Update environment variables” if the menu. Then, in System Properties/Advanced Parameters click on Environment Variables and in In System Variables, update the PATH variable, by adding the paths for Python. In my case c:\Python27 and c:\Python27\Scripts\ . This last directory will contain all required and additional Python libs and modules.
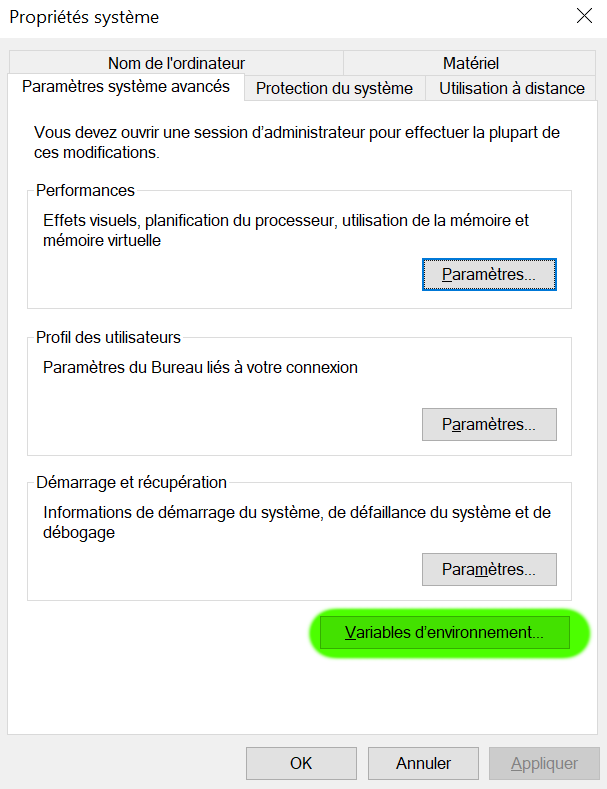
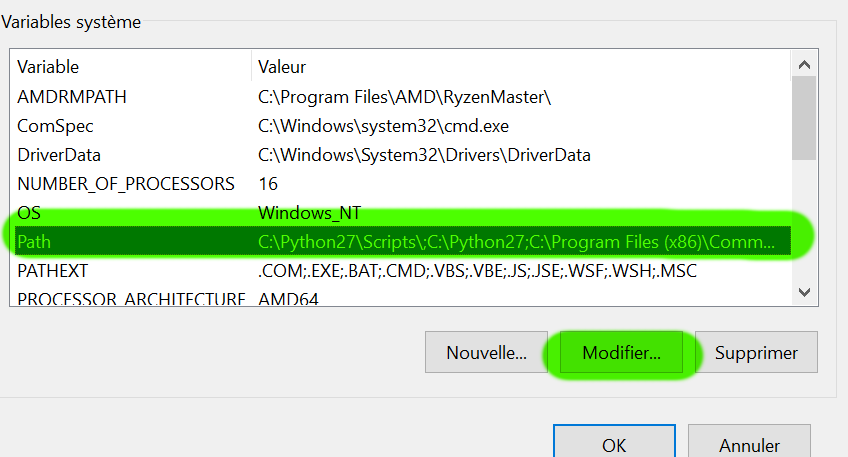
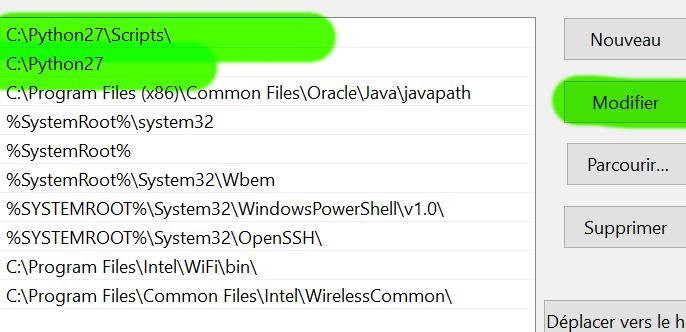
Additionally, we also have to create a new system environment variable called PYTHONPATH. its value must be the root directory of Python, in my case my c:\Python27 folder.
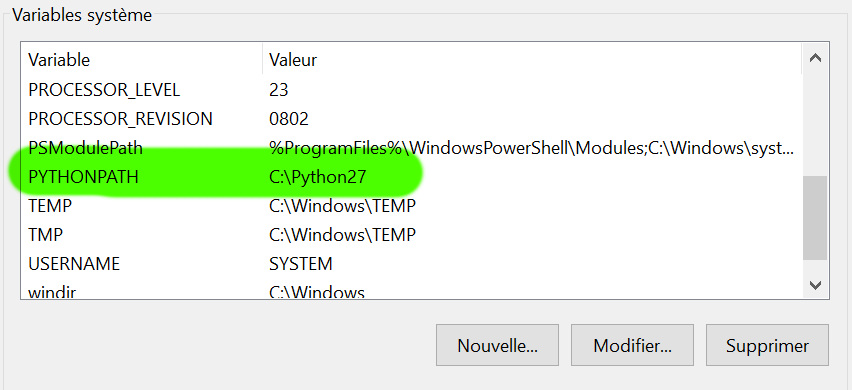
validate all changes, and normally, Python should be usable. Try opening the standard editor, called IDLE (search bar or c:\Python27) or open a shell (cmd in the search bar) and enter the command python –version. It should display the version 2.7.15.
Step #3 – Eclipse install
Eclipse is a versatile Integrated Development Environment, fully customizable with additional modules. May be a bit complex, but very powerful. Don’t be afraid, in our case, we will use only 2% of Eclipse capabilities.
Let’s start by downloading the right Eclipse version. The latest, as of today, is the version 4.9. called Kepler. Choose the right one for your operating system, and also a “pre-packaged” version.
I recommend to choose the version for Java Developers, because it contains the minimal set of useful tools, such as a Git integration (we could speak about it later).
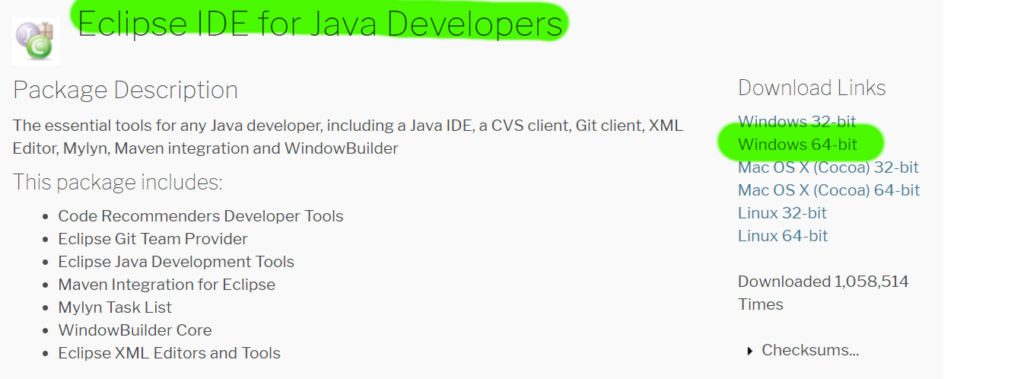
After the download, you have an archive to deploy to a useful location. I suggest the root c:\ for Windows, as for the previous Python install. And that’s all… Eclipse is installed. Simple, isn’t it? At this stage, you can start Eclipse (executable file eclipse.exe in the eclipse folder for Windows).
Step #4 – Python add-on for Eclipse – PyDev
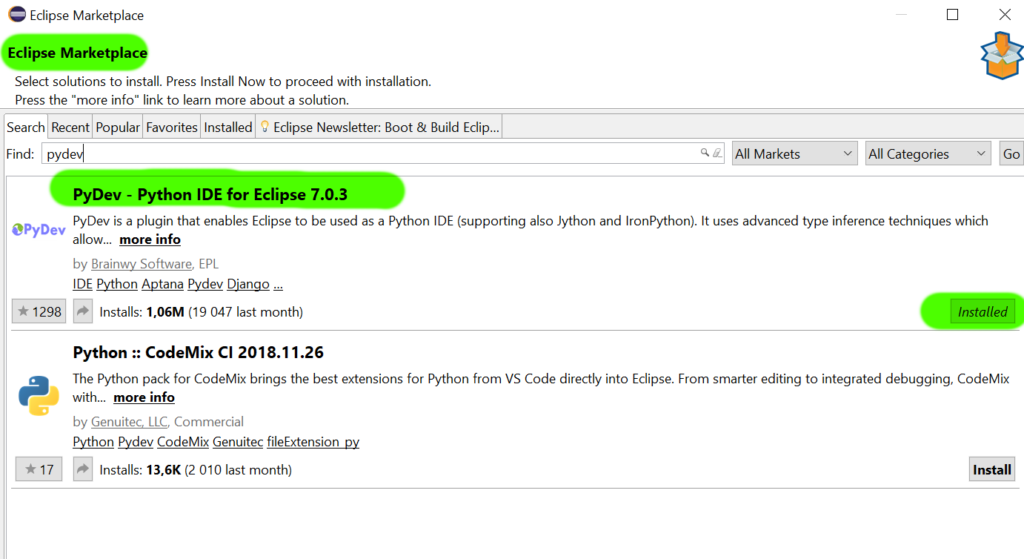
Because our Eclipse is the package for Java development, we have to install an additional plugin for Python environment, called PyDev. Very simple, actually. Go to the menu Help and choose Eclipse Marketplace and enter PyDev. Then install it, by confirmed the two features to install: PyDev for Eclipse and PyDev Mylyn Integration. Normally, the installation should find your Python path.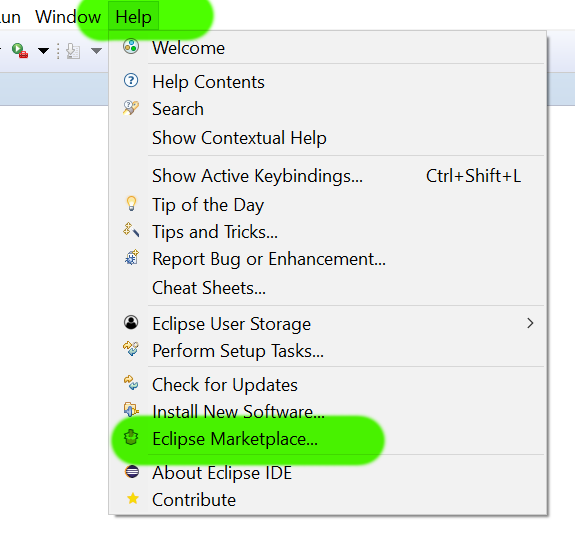

Step #5 – Python hello World
Now, everything should be ok. Eclipse environment contains many pre-configured environments, called “Perspectives”. In our case, we will swith to the Python perspective.
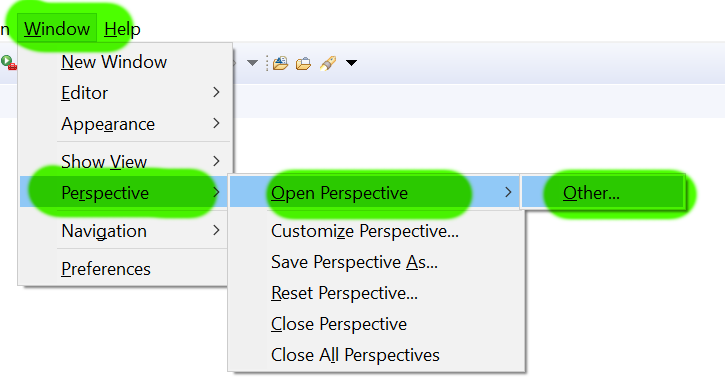
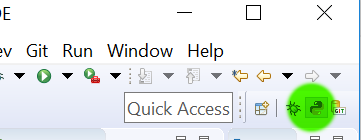
Go to the menu Window, and choose an other perspective: PyDev. Later, you will be able to directly access to this perspective by clicking on one of the top right (very small) icon for the PyDev perspective.
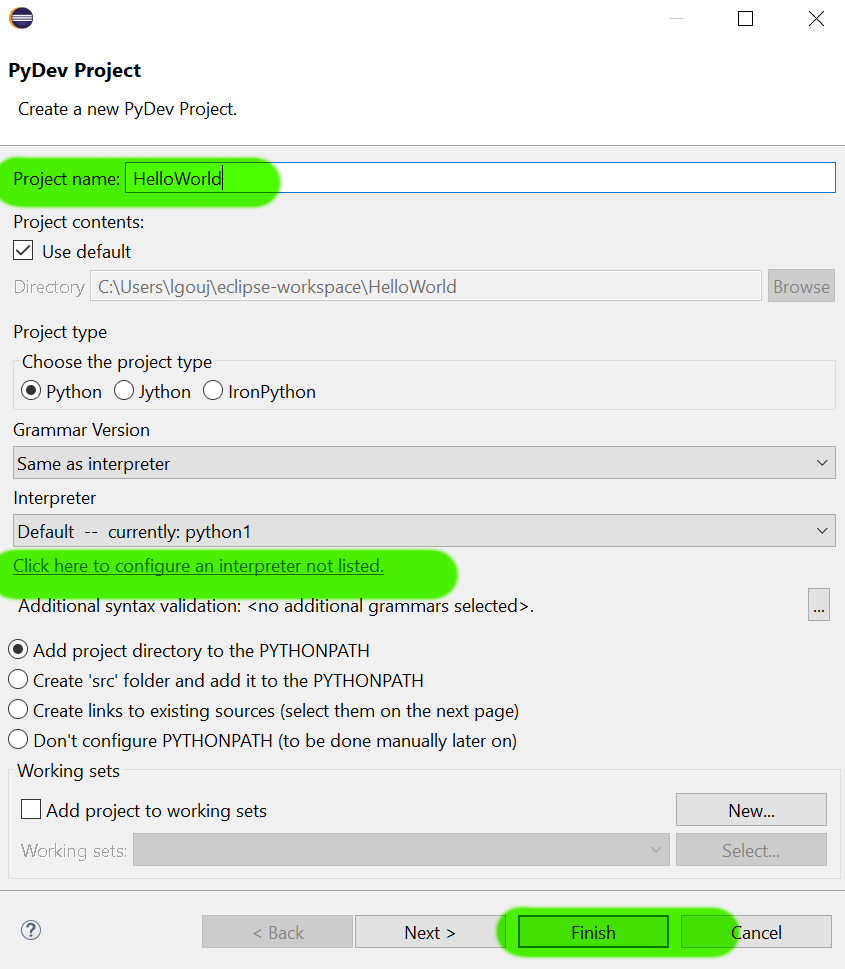
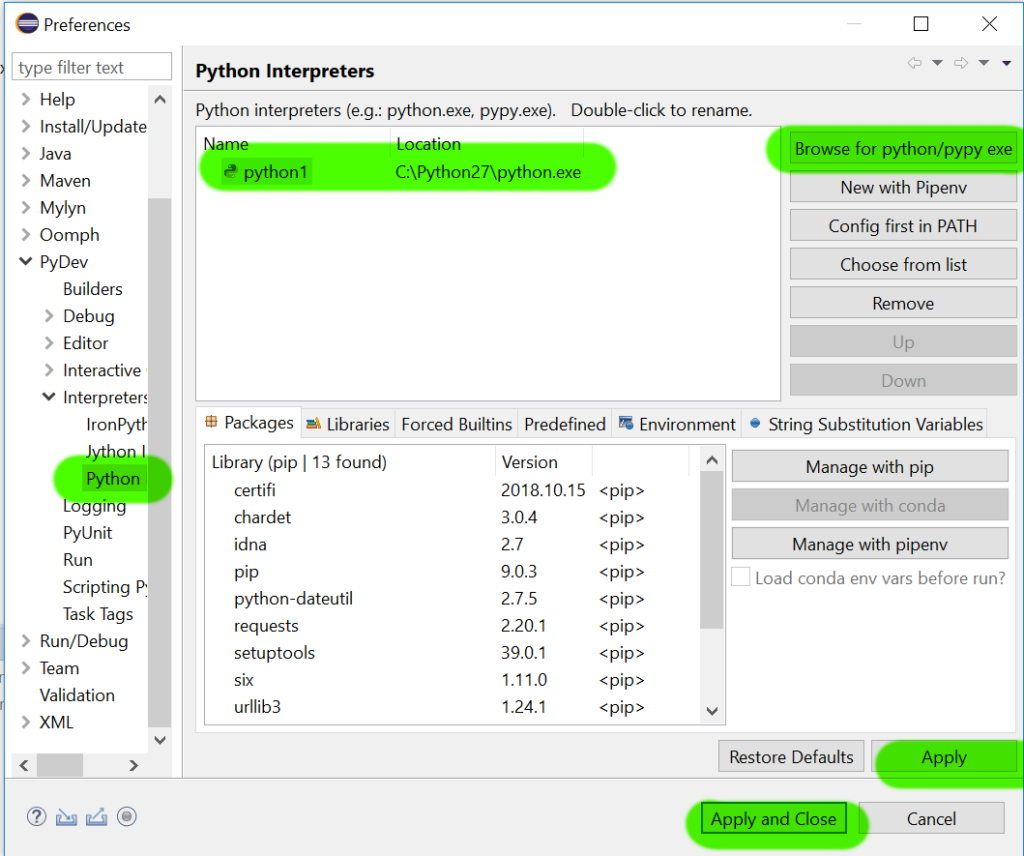
Now, let’s create a new PyDev project, named HelloWorld. If the Interpreter is not configured with python1, configure it with the path where you installed Python.

Let’s create our 1st Python script. We can do this with the contextual menu New/File on the project HelloWorld.
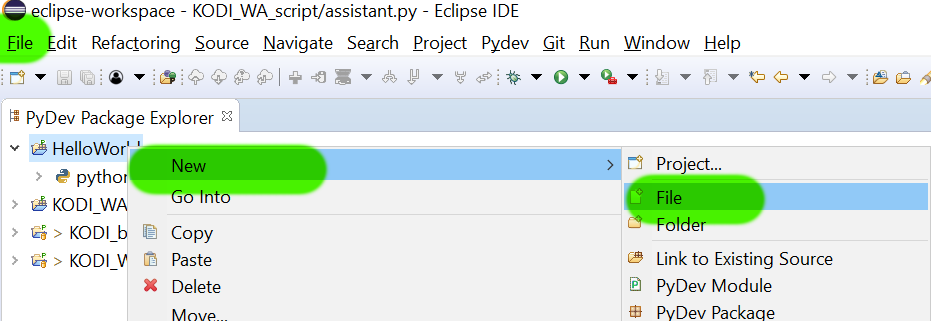
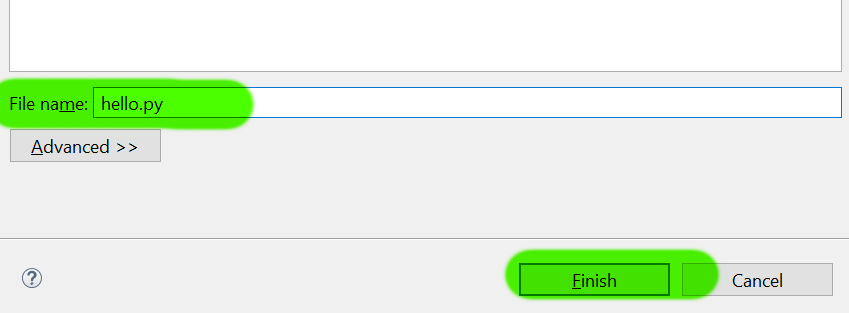
Enter a name, e.g. hello.py then validate. At last, enter the following code: print(“Hello World”) and save (CTRL-S).
At last, you can execute your script, by clicking on the Run button in the tool bar. You should see “Hello World” in the console.
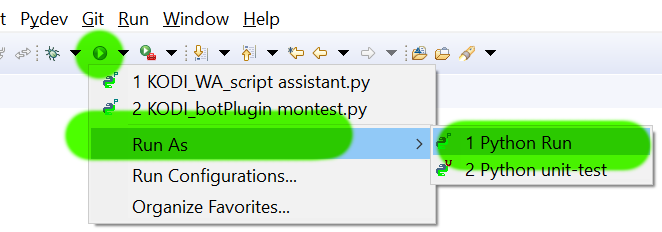
Bravo ! You ended the setup of the Python / Eclipse environment.
The next stage will be very different: start playing with Watson Assistant!